~~~~~~~~
~~~~~~~~~~~~~~
~ ~~~~~~~~~~~~~~~~~~
~~~~~~~~~~~~~~~~~~~~~~
~~~~~~~~~~~~~~~~~~~~~~~~~
~~~~~~~~~~~~~~~~~~~~~~~~~~
~~~~~~~~~~~~~~~~~~~~~~~~~~~~~
~~~~~ ~~~~~~~~~~~~~~~~~~~~~~~
~~~~~ ~~~~~~~~~~~~~~~~~~~~~~~
~~~~ ~~~~~~~~~~ ~~~~
~~~~~ ~~~~~
~~~~ ~~~~
~~~~ ~~~~
~~~~ ~~~~
~~~~ ~~~~
~~~~ ~~~~
~~~~ ~~~~
~~~ ~~~~~~ ~~~~~~~ ~~~~
~~~ ~~~~~~ ~~~~~~~ ~~~~
~~~ ~~ ~~ ~~ ~~~~
~~~ ~ ~~ ~~ ~ ~~ ~ ~~~
~~ ~ ~~~
~~~ ~ ~~~
~ ~ ~ ~ ~
~ ~ ~ ~
~ ~ ~~ ~
~ ~ ~ ~
~ ~ ~~ ~~ ~ ~
~~ ~ ~~ ~ ~~
~ ~ ~ ~
~ ~~~~~~~~~~~~~~ ~
~ ~~~ ~~~ ~
~ ~~~~~~~~~~~~ ~
~ ~~~~~~~~ ~
~ ~
~ ~
~ ~
~ ~
~ ~
~ ~
~~~~~~~~
Apple Watch Tutorial

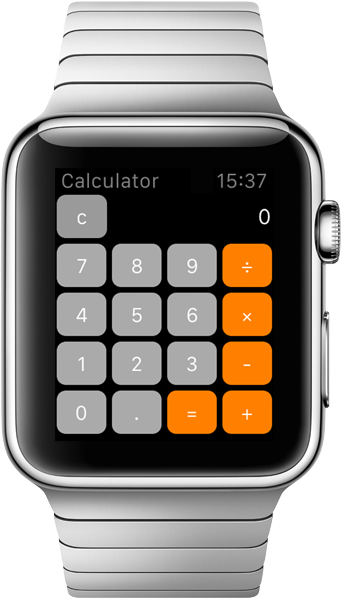
Inspired by the retro Casio calculator watches from back in the day and Apple’s calculator widget on Yosemite, I decided to create my first Apple Watch app. Creating a calculator for the anticipated gadget has been perfect to get familiar with the new Apple Watch SDK. I have tried to keep this tutorial as easy as possible so you can follow along.
The final product of this tutorial can be downloaded from Github.
Goals of this tutorial
This tutorial is not meant to teach programming fundamentals. Nevertheless, prior experience with programming is not required. If you want to learn basic programming I can highly recommend the introductory course on Computer Science by MITx.
Goals
- create your first Apple Watch app
- get a feeling for the Swift programming language
Okay, let’s get started. Good luck!
Project setup
At the time of this writing, you have to download the Xcode beta to start playing around with WatchKit.
After downloading, installing and finally launching the Xcode beta you will have to create a new project. Next, a template selector is presented. Each of the available templates have some basic setup to help you get started. Select the iOS Application tab and choose Single View Application. The Single View Application is the most basic of the available templates. As we are going to create an Apple Watch app and not an iPhone app the most basic template suits all of our needs.

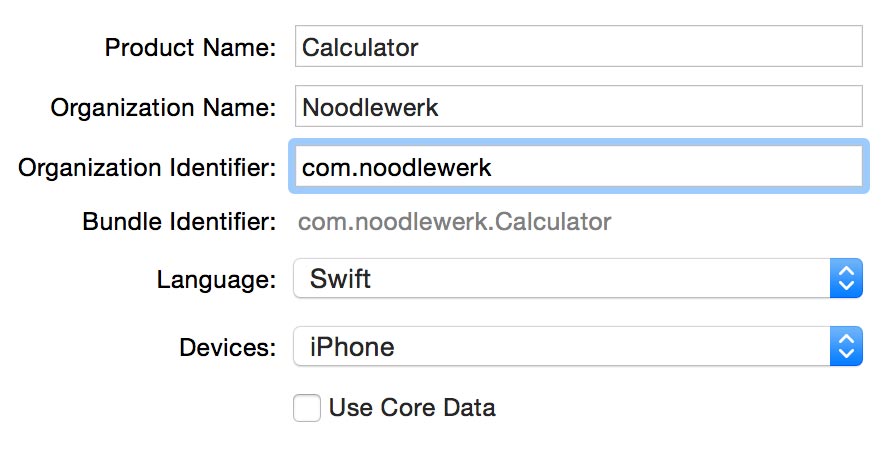
Next we are asked to set a few options for our new project. Give the product a name, I go with Calculator. You could use your own name for the organization name. As a language we are going to use Swift. From the possible devices select iPhone and uncheck Core Data because we will not store any user data. Press next and choose a suitable location to save the project folder.
Apple Watch template
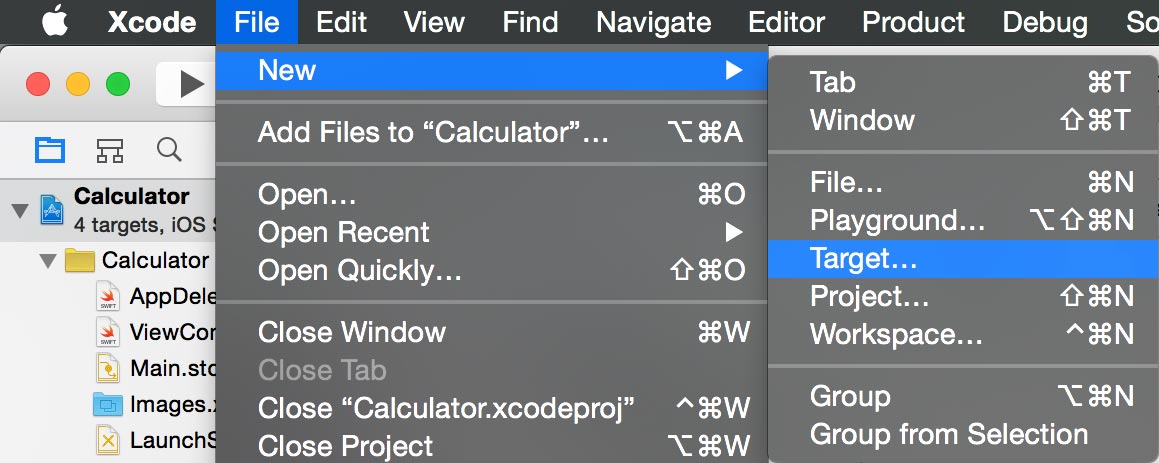
After creating our Calculator project we end up in the Xcode interface. Currently our project is setup to build an iOS app. We need to add a new so called target to start creating our Apple Watch app. From the menubar select File, next select New and then select Target.
Again, we are presented with the template selector. This time we choose the Apple Watch App template. In the next view the product name and organization identifier are automatically set. As a language we choose Swift. Unmark the include notification and glance screen options and press Finish to add the Apple Watch target to our project.
App architecture
After adding the Apple Watch target, two new folders have been added to our sidebar. Calculator WatchKit Extension and Calculator Watch App. If you named your product something other then Calculator these names will be different.
At the time of this writing the logic of our Apple Watch apps must be processed by an accompanying app which runs on the iPhone. This accompanying app is called a WatchKit Extension and can be found in the similarly named sidebar folder. Only the interface is run on the Apple Watch. Each interaction is sent over bluetooth to the paired iPhone which runs the Extension. As you might imagine this wireless communication causes a noticable delay.
If you like to read more about this subject Apple has you covered with the WatchKit Programming Guide.
Interface
To create our interface, we do not have to write a single line of code. In Xcode we have so called Storyboard files that open in Interface Builder in which we can drag and drop interface objects like buttons and labels. From the sidebar in Xcode unfold the Calculator Watch App folder and select the Interface.storyboard file. You are now presented with an empty black Apple Watch screen. The screen is black by default making it blend with the hardware.
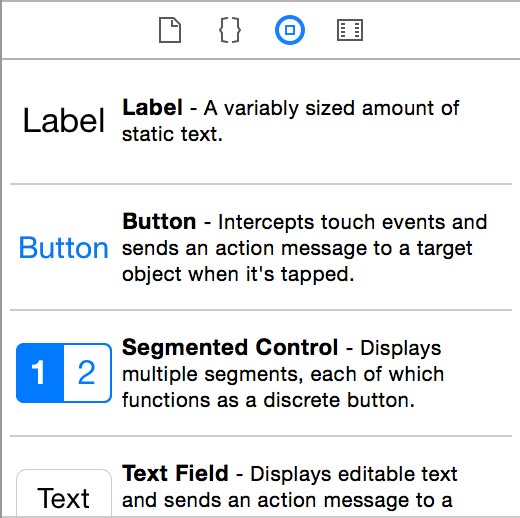
You can drag objects from the object library to create the interface. If you drag a second button from the library you will notice they can only be placed vertically to each other. To position objects in a row we first need to add a group object. Drag a Group object from the library and drop two Buttons inside of this group. Since both buttons occupy the full width only one of them is visible. For cases like these we have the document outline which gives us a clear look at the hierarchy of all objects. You can hide and unhide the document outline by selecting this option from the Editor menu in the menu bar. Select both buttons and open the Attributes Inspector in the sidebar on the right.
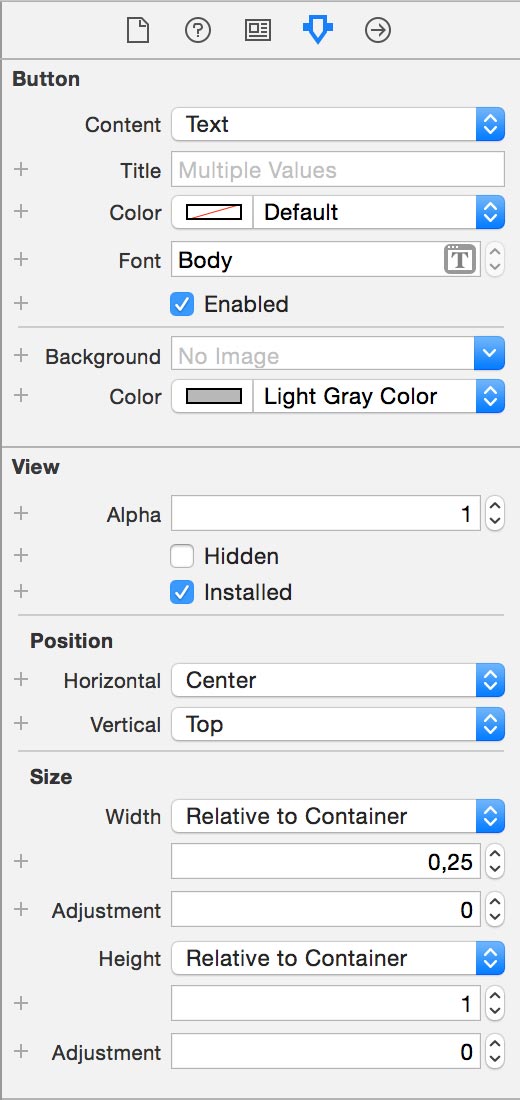
Keep the width option at ‘Relative to Container’ but change the value from 1 to 0.25. Using the attributes inspector you can change things like size, position, text color, background color and font size.
Now that you know how to position, size and style the objects, you should try to finish the remainder of the interface on your own. The interface consists of four groups, a single label to display the calculations and a lot of buttons.
You can change the text of buttons and labels by double-clicking them in Interface Builder.
Demo time
Select the Calculator Watch App target and an iPhone to run it on. Press Run (play icon).

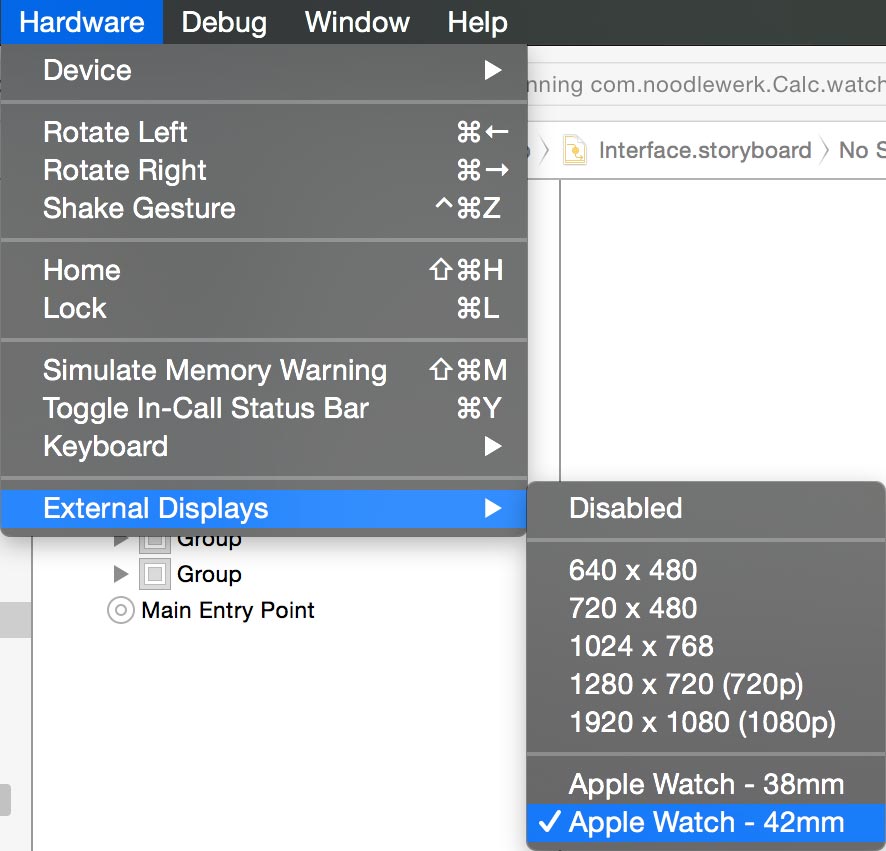
The Simulator will start and show you an iPhone but no Apple Watch yet. To view the Apple Watch simulator go to Hardware in the menubar, now go to External Displays and choose Apple Watch 42mm. A new window appears with a black screen. Go back to Xcode and run the Apple Watch app again to make it appear in the simulator.
Linking the interface with the extension
We are now ready to connect the buttons of the interface with the underlying logic. As mentioned earlier the logic is processed by the extension which runs on the iPhone. All of the interaction logic we are going to write will reside in a single file. This file has already been added to the extension as part of the template. The file is named InterfaceController.swift. When you open the file you see three pre-defined methods all starting with func. To create the calculator, we do not need any of them, so delete them. The file should now look like this:
import WatchKit
import Foundation

class InterfaceController: WKInterfaceController
{
    // here you will write all the interface controller code
}
When any of the buttons get tapped we want to know about it. To do so we need to have an individual connection with each of our buttons. The easiest way to create these connections is by viewing the InterfaceController.swift and Interface.storyboard side by side. We can open a second file by alt-clicking this file in the sidebar. While having the InterfaceController file open alt-click the Storyboard file. The storyboard file should now be on the right.
To make the actual connection, hold the control key on your keyboard and press-and-hold your mousebutton on the 0-button of the calculator. Keep holding down the mousebutton while dragging your cursor to the file on the left. While hovering between the curly braces you should see the text ‘Insert Outlet or Action’. Now you may release your mousebutton. A popover appears where you can choose to insert an outlet or action. An outlet is a variable which connects a user interface element with code and an action is a method which will be called when an user interacts with the element on screen. Choose Action from the available connection types and name the method button0Tapped (note the zero 0). This connection is called an IBAction.
Inside the method we add one line of code which will print a string in the Debug area in Xcode. When the string gets printed we know our connection is working properly. Add the following inside the method.
@IBAction func button0Tapped()
{
    println("button 0 tapped")
}
Run the app in the simulator to and tap the 0-button. If you set everything up okay you should see the string ‘button 0 tapped’ appear in the Debug area.
Repeat the steps from above to create an action for each individual number button.
We are not going to repeat the same logic in each of the action methods (for more information read Don’t repeat yourself). That’s why we will create a new single method which handles all number button actions. Add the following function somewhere above the IBActions.
func numberPressed(value: Int)
{
    let currentValue = "\(value)"
    println(currentValue)
}
Now modify the code of the 0-button action to look like this.
@IBAction func button0Tapped()
{
    numberPressed(0)
}
Repeat this logic for each of the 9 other number buttons. After you finish writing this code you can run the simulator to check if all connections are created properly.
In the InterfaceController we are going to declare two variables. The first holds the current value, a string. “Why a string?” You might ask. The manner in which numbers are entered on a calculator is easier done by appending strings then using mathematics. We append each digit to the end of a string.
The second variable is a boolean named calculationExecuted. When a calculation is executed we need to be aware of this because two things can happen: either a number is tapped and the previous value is discarded or a command is tapped and we use the result in a new calculation. Declare the following two variables at the top of the controller class.
var currentValue: String = "0"
var calculationExecuted = false
Next, we want to connect the display label from within the storyboard with the InterfaceController. Open both files side by side (remember: hold alt while selecting the second file), just like we did connecting the buttons. Control drag from the label to the controller. Name the outlet displayLabel and press connect. This creates an IBOutlet.
@IBOutlet weak var displayLabel: WKInterfaceLabel!We can now change the numberPressed method to show direct feedback in the interface.
func numberPressed(value: Int)
{
    let newValue = "\(value)"

    // whenever the current value is 0 and whenever a calculation has
    // been executed we want to replace the value with the number pressed
    if currentValue == "0" || calculationExecuted
    {
        calculationExecuted = false
        currentValue = newValue
    }
    else
    {
        // append stringvalue of the pressed button to current value
        currentValue += newValue
    }

    displayLabel.setText(currentValue)
}
Run the simulator to see the tapped numbers appear in the virtual display.
Now we will create connections for the decimal and clear buttons.
@IBAction func clearTapped()
{
    currentValue = "0"
    displayLabel.setText(currentValue)
}

@IBAction func decimalTapped()
{
    // check if dot sign already exists in current value
    // we only want to add it once
    if currentValue.rangeOfString(".") == nil
    {
        currentValue += "."
        displayLabel.setText(currentValue)
    }
}
Command logic
Because the command actions share the same logic we will create a single method to handle all four of them. But before we do that, we are going to create a new Class which knows about the selected command and only executes the command after the user presses the answer button.
To create a new Class, select File from the menubar, go to New and select File (shortcut: ⌘+N). Name the Class Commmand, make it a subclass of NSObject and select Swift from the available languages. Press next, make sure only the extension is selected from the possible targets and press create. A new file named Command.swift should now be visible in the sidebar. Open this file.
There are four different command types: divide (÷), multiply (×), subtract (-)and add (+). We want the Command class to remember what type the user has selected. Therefore our class needs to know about all the available types. To do this we write the options inside an enumeration. An enumeration defines a common type for a group of related values.
Add the following code between import UIKit and class Command: NSObject.
import UIKit

enum CommandType
{
    case Divide
    case Multiply
    case Subtract
    case Add
}

class Command: NSObject
{
Inside the class we will add two variables. One CommmandType which will save the type, this variable can change. The second variable is the old value (named oldValue) of the calculation. This value can not change after initialisation. In Swift, mutable variables are defined with var and static ones with let. Add the following two variables inside the Command object.
class Command: NSObject
{
    var type: CommandType
    let oldValue: Double
}
Inside the class we add a convenience initializer method where we assign values to both variables.
init(type: CommandType, oldValue: Double)
{
    self.type = type
    self.oldValue = oldValue
    super.init()
}
The Command object only has one more method which executes the calculation. This method checks the commandtype, performs the calculation and returns the result.
func executeWithNewValue(newValue: Double) -> Double
{
    var result = oldValue

    // check current type and do appropriate calculation
    switch type
    {
    case .Divide: result /= newValue
    case .Multiply: result *= newValue
    case .Subtract: result -= newValue
    case .Add: result += newValue
    }

    return result
}
Calculation
Let’s continue by getting back to the InterfaceController.swift file.
Add a variable which hold an optional selected command. We indicate the optional state with a question mark (?) immediately after the variable type.
var currentValue: String = "0"
var calculationExecuted = false
var command: Command?
Add command logic to existing clearTapped method.
@IBAction func clearTapped()
{
    command = nil
    currentValue = "0"
    displayLabel.setText(currentValue)
}
Code for commandTapped.
func commandTapped(type: CommandType)
{
    calculationExecuted = false
    if command != nil
    {
        command!.type = type
    }
    else
    {
        command = Command(type: type, oldValue: (currentValue as NSString).doubleValue)
        currentValue = "0"
    }
}
Let’s hook up the command actions with the commandTapped method.
@IBAction func addTapped()
{
    commandTapped(.Add)
}

@IBAction func subtractTapped()
{
    commandTapped(.Subtract)
}

@IBAction func multiplyTapped()
{
    commandTapped(.Multiply)
}

@IBAction func divideTapped()
{
    commandTapped(.Divide)
}
Show the new value in the display label.
func setDisplayValue(value: Double)
{
    //  check if value is an integer
    if value % 1 == 0
    {
        // our value is an integer
        currentValue = "\(Int(value))"
    }
    else
    {
        // our value is a float
        currentValue = "\(value)"
    }

    displayLabel.setText(currentValue)
}
Code for answer.
@IBAction func answerTapped()
{
    // only do calculation if a command has been selected
    if command != nil
    {
        let answer = command!.executeWithNewValue((currentValue as NSString).doubleValue)
        setDisplayValue(answer)
        command = nil
        calculationExecuted = true
    }
}
Conclusions
Now run this again in the Simulator.
Congrats! You should now have a working calculator. If not, we probably need to improve the tutorial. Feel free to ask for help on Twitter.
Using the calculator you will probably notice a delay between action and feedback. Hopefully we will gain access to the watch his own processor with a future version of the Watch SDK.
You can download the completed project at Github.